How to Make UI/UX Moodboards
Soumyadeep Auddy
From the pretty girl with a pinboard of summer outfits to the architect with many pictures of window frames in their gallery, mood boards are important when trying new things, styles, or creations.Creatives or not, we all need a collection of things we find very attractive to inspire us to create what we love easily. We are attracted to aesthetically pleasing things, so we make a conscious effort to replicate many things we see on Instagram or Pinterest.How amazing would it be for designers to have a stack of designs to create an aesthetically pleasing app or website for you? Lets walk through the process of making a collection that would make the design journey easier.
What is a Moodboard?
A mood board is a visual representation of brainstorming. It is a collection of visual elements that can be replicated, recreated, or redesigned to make a creative piece. It helps to lay the foundation for our imaginations to become a reality.Moodboards form part of the research for the UI/UX design process, especially for UI designers. They notice design elements and trends that would help their solution be more functional, attractive, and usable for users.Creating mood boards for UI/UX is more extensive because of their problem-solving nature. Every button, card, or font must try to solve the user's problem or pave the way for solutions to help the users. So, it is not something designers can skip in their process if they want a smooth flow.
Elements of UI/UX Moodboard

- Shapes
- Colours
- Typography
- Whitespace
- Visual Weight/Volume
- Structure/Arrangement
When to Make UI/UX Moodboard?

The ideal time to make a UI/UX mood board is after the UX research has been conducted before starting the actual design. The UX research gives you all the information you need about the user, the design, and the brand. This knowledge makes it easier for you to streamline your search effort, focusing on the outcome of the UX Research.This does not mean the mood board should be rigid and not accommodate anything outside the UX research. You can then divide the mood board into research-based and inspiration-based to show their importance when making decisions.The mood board can be updated as needed; there are no strict rules regarding when. To get the most out of your mood-boarding session, involve the stakeholders and users.
Who should create the UI/UX mood board?
Some clients would think it is the work of the UI designer; some will think it is the responsibility of the UX designer. Lets get that out of the way!The crux of the matter is that anyone involved in the design process should be able to create a mood board. Why? You may ask.UI/UX design is not the Job of designers only. While the main responsibilities lie with the designers (interior, graphic, fashion, visual, or communication designer), other teams need to be actively involved in the design process. (Insert link to Alok Sharma YS Insight.) This would help create the best solution a user can ever ask for.It is important to know the specialists who are responsible for creating mood boards. They are Visual designers, UI designers, and interaction designers. Their speciality is converting user and design research into something beautiful for the users. So, they should be at the forefront of brainstorming the visual elements of the design solutions.
Why is a Moodboard important?

Highlighting the importance of a concept can help you understand it differently. The importance of mood boards in your UI/UUX design process will convince you to try them out if you have been shying away.It sets the ball rolling: Whether before or after the UX research, creating a mood board spurs you into action. It gives designers the inspiration and motivation they need to start taking action.It helps with easy collaboration: A mood board is the easiest way to share plans, goals, and ideas for a project with the stakeholders in a way they will understand easily.Project Planning: A mood board arranges desired elements or designs. It brings a sense of visual organization to the desired outcome and serves as a guide throughout the design process.Brand Identity Development: Mood board forms the basis for implementing brand elements like colours and typography rather than wasting time designing or trying out multiple elements. It is easier to streamline designs that align with the brand identity and UX research.Trend analysis: Creating mood boards will help you identify trends or design techniques used concurrently in many designs. For example, when neomorphism was in vogue, every designer wanted to show off their skills, so it became the trendy design style on Behance and Dribble.Personal Expression: Moodboards reflect individual tastes and styles in design. They show a designer's creativity, expertise and how their creativity will contribute to the overall project.
How to Create a Moodboard
Creating a mood board is one of the easiest parts of the design process. It doesnt require a lot of mental energy, like designing or researching. It can even be done subconsciously during leisure hours or while scrolling through social media. Like the design process, creating a mood board is not a linear process. Find what works for the design and designers to get the best.
List the Design Elements and their sources.
From an expert's point of view, this is the first step to give you an easy flow of the process. You need to know what elements the project needs and list where you can easily find them or places you trust for the best outcome.For example, Freepiks is one of the largest collections for illustrations and vector design; unsplash and Pexel are perfect for high-quality pictures and videos.Listing them out with the link to their website will make them easier to reference anytime you want to access them. Competitors' websites and apps are also very helpful in gathering the information you need. This will help you design to stand a chance in the industry.
Gather Inspiration (Google, Pinterest, Behance)

It is easy to gather designs and design elements that can be recreated and repurposed. You can start using search terms related to the project, like industry or element-specific keywords.You must try various keywords to ensure the best online result. Try to gather as many design or design elements as possible in Google Docs or a Figma file. It is advisable to copy and paste the image rather than using links for better visualization.Here is a list of libraries you can get inspiration from:
- Google Images
- Behance
- Dribble
- Pexels
- Figma
- LinkedIn, Instagram, etc
Select visual elements and Features
Not every design you select will resonate with you or the project. For some, it can be an image; for others, it could be the button or the CTA. This is where you start selecting the part of the design you like and think would be useful. You can find a way to crop that selected part to make your board less crowded.You should know that all the elements should have the same visual style. You might want to consider cover screens, mob, web, icons, UI elements ( cards, cta, tabs, etc.), typography, colour palette, animations, illustrations, images, or both. Soumyadeep Auddy, UI Head at YellowSlice.
- Choose images that complement the brand's services or offerings. You cant use the image of a doctor for a law firm website.
- The colours should align with the brand's colour. If the business doesn't have a colour, you can choose colours that complement the brand's nature. For example, Pink and sky blue would be most appropriate for children's diaper brands.
- The focus of typography should be legibility rather than aesthetics.
Select tools/software to create the Moodboard

Many tools are available to create a mood board; you should select the ones you are familiar with. You should also collaborate easily on the tool you have chosen to include other designers and stakeholders.
- Figma: Many designers are familiar with Figma, so it is easy to arrange and manipulate the designs you have gathered.
- Adobe Photoshop: It is for advanced designers who want to experiment with image manipulation and see how they would fit. It doesnt allow easy collaboration, but you can do almost anything with Photoshop.
- Pinterest: It is available on both mobile and desktop. It allows you to save images for reference in the pinboards, but you cannot collaborate with other users except by showing them physically or sharing a screen in a meeting.
- Canva: This is a large collection of visual elements, and they are easily customizable templates you can use to design your mood boards and get inspiration for elements.
- Google Docs: Google Docs is user-friendly, but you must start the process from scratch. You can also easily collaborate with other people.
For brand owners unfamiliar with advanced tools, Google Docs or Canva are very user-friendly, and you can collaborate with your designers. You can use one or more tools, as the case may be, but it is advisable to keep at least two.
Arrange the elements
The sorting begins once you have gathered enough materials and know the tool. You have to sort these designs into groups that will be easier for others and yourself to understand later.The extremely crucial part is making a story and creating a hierarchy. Essential elements should be placed first, followed by less-prioritizing elements. You can sort it based on the design section, starting from headers, logos, or hero sections. Soumyadeep Auddy, UI Head at YellowSlice.You can also sort them based on design elements like colours, typography, white space, visual weight, buttons, CTAs, etc. Sorting based on the popularity of the design can also help you to know what designers and brand owners are using. Avoid random placement of the selected references.Ensure your mood board has a logical flow and tells a story of how you expect the user to move in your design. Consider the overall composition, colour balance, and the relationship between elements.
Explain your choices
This is documenting your process. You have to justify your choice of inspiration, which must make sense to you before it makes sense to anyone else. Your explanation could be a short explanation or bullet points explaining why you selected a particular design and its relevance to the design.Take a minute or two to highlight the good things about your choice and explain why you included them on the mood board. Soumyadeep Auddy, UI Head at YellowSlic.It will help you easily remember your intentions and communicate the same to the people involved, especially when many people are assigned to create a mood board. You can consider questions like these to help you structure your documentation:
- Which mood/theme am I trying to convey?
- Why is this colour, font or shape important?
- How is this design relevant to the brand/
- Will the users easily get the concept of this element?
Now your mood board is ready to assist in your design Journey!
Five Quick Tips for Effective UI/UX Moodboard
These are extra things to keep in mind during and after creating your mood board to avoid problems in the long run. See this as a professional finishing touch to your mood board.
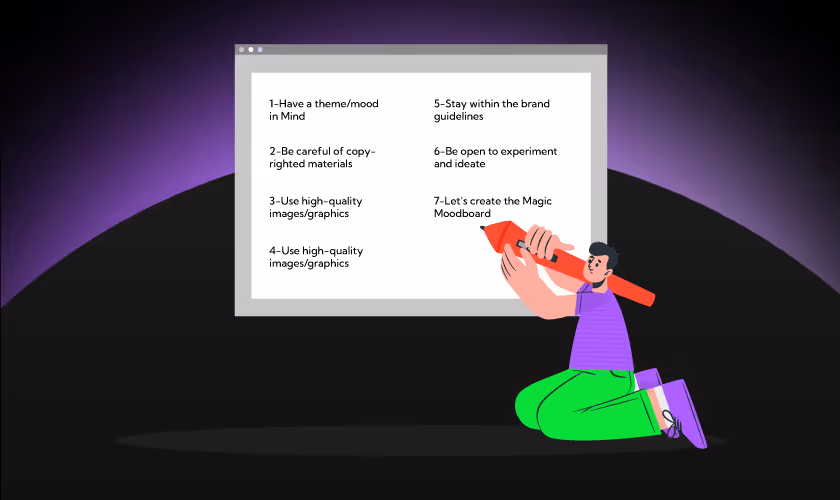
Have a theme/mood in Mind.
This is very important in making your design as human-centric as possible. The solution must convey an emotion, and the mood board plays a role. You must select a theme or mood that aligns with what the brand is offering.Give each style a name; it would have more impact on the audience and create a visual identity. It would be even better if the name were cliche to have more impact. The name should speak about the visuals. Soumyadeep Auddy, UI Head at YellowSlice.For instance, A telehealth app has to convey confidentiality and trustworthiness to users, so whichever elements you select must show utmost confidentiality. The font will have to be formal or semi-formal, and the colour should be cool, like blue.
Be careful of copyrighted materials.
You do not want a brand to accuse you of stealing their design after your design has reached the first 1,000 users. So, to avoid legal issues or online trolls, check your sources thoroughly and read the terms of usage.If you find an image you love on a Shutterstock photo website, check the licensing terms to determine if you can use it for your project. The same applies to Behance or Dribble; ensure you have permission to reuse and recreate.
Use high-quality images/graphics.
How would you feel if your favourite YouTube show was uploaded at 144p? Cringe, right? That is exactly how your users will feel if they discover their favourite app uses pictures from the 17th century.If you cant get RAW files from the project owners, that will be the best! If not, download them from the website at the highest quality. This will increase the emotional appeal of your mood board and the design in the end. Quality images and videos are available from Unsplash and Pexels; most are free.
Stay within the brand guidelines.
Every designer should follow this process regularly. Suppose your mood board meets the brand guidelines. In that case, it is easier to focus on building creativity with the available resources rather than just gathering inspiration that might not work for the brand.
Be open to experiment and ideate.
Always remember that you are designing a mood board. You can play around with it and seek a second opinion. Don't be afraid to experiment with different elements and combinations. A mood board is a tool for exploring and getting inspired.
Lets create the Magic Moodboard!
If you follow these tips and steps, your workflow's efficiency will drastically improve. You will also stimulate yourself for the big work ahead! Remember, amood board is a living document that can evolve as your project progresses. It should not bind you but give you wings to fly on Figma.You have the mood board; we have the magic! Are you ready to bring your design vision to a live product? YellowSlice is a future-forward design agency that helps B2C and B2B brands create functional designs to scale their business operation. Let us capture the essence of your brand and achieve your goals today.
FAQs
1. What is a Moodboard in UI/UX?
As the name implies, a UI/UX mood board is strictly intended to inspire the implementation of solutions for users through an app, website, or digital experience. It is the collection of UI/UX elements, like headers, footers, CTA buttons, forms, typography, etc., that convey a mood, theme, or atmosphere for a design project.
2. What is the difference between a mood board and a lookbook?
A mood board generally conveys one theme/mood for a design project, and various mood boards can be created for a project. A lookbook is a collection of visual ideas; it doesnt necessarily have to have a theme. It is more of a marketing design guide than an actual design guide.
3. Are there examples of Moodboards?
Yes! There are so many examples on the internet that you can replicate and use in your next project. It can be a collection of high-quality images with a nature-inspired theme.
4. How often should I update my mood board?
As your project evolves, it's important to revisit and update your mood board to align with your goals. Consider updating it whenever significant changes to your design, branding, or target audience exist.
5. Can I use mood boards for non-digital projects?
Mood boards are not limited to UI/UX design only. In fact, UI/UX designs borrowed the idea of mood boards from interior design. They can be used for various projects, including print design, product design, and event planning. The principles remain the same: create a visual representation of the desired mood and atmosphere.
Authors Bio
Soumyadeep AuddyHe pursued Communication design, specializing in UX/UI design. His love for sketching, doodles, technology, and communication through storytelling with the help of visual aids has always driven him to be a creative geek. He enjoys photography, playing with fonts, exploring different archives on typeface specimens, and reading to become the next companion in his leisure time. He is currently the head of UI Design at YellowSlice, and his expertise is Storytelling, Branding, UX/UI, Photography, Type Enthusiast, and Sketching.

Let's create something amazing!
Let's discuss your vision and how we can bring it to life with impactful design solutions.
.avif)
Good design starts with Sliced Newsletter
Subscribe to the Sliced newsletter and get the best of research, UX writing, product psychology, CX, and design systems, right in your inbox.
